Start with one task
When you open SpicaGF, the first thing you see is the Daily view — the screen you’ll use every day, listing that day’s events and tasks together. The quickest way to learn the app is to create one task and watch where it lands. This guide walks through the whole flow.
Step 1: Tap the + button
Tap the blue round + button in the bottom right of the screen. A sheet appears with two choices, Task and Event. Choose Task.
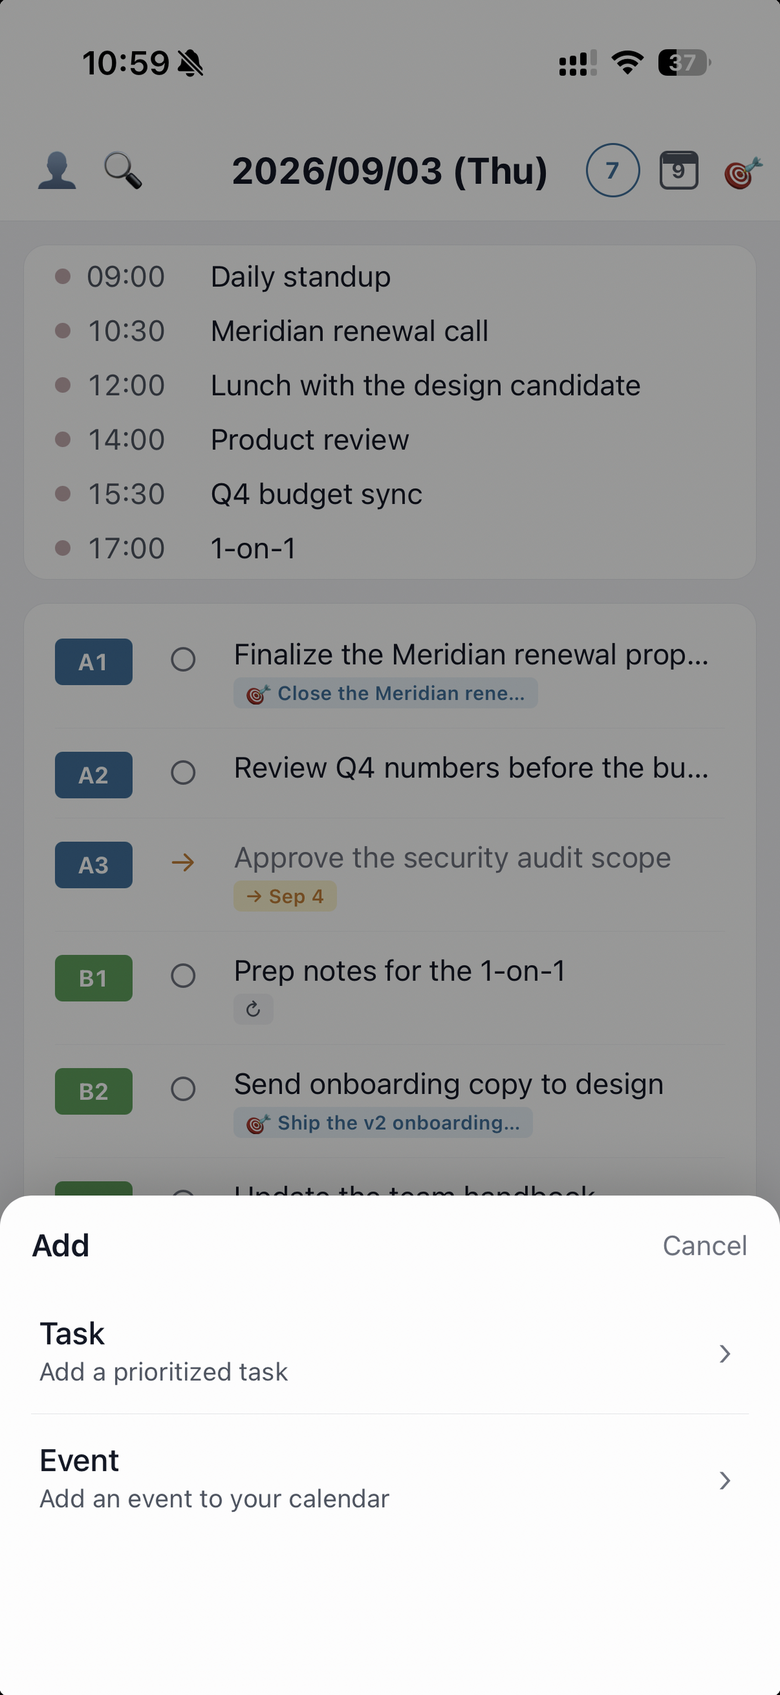
Event is a timed entry that syncs with your calendar app. It’s a different thing from a task, so choose Task here.
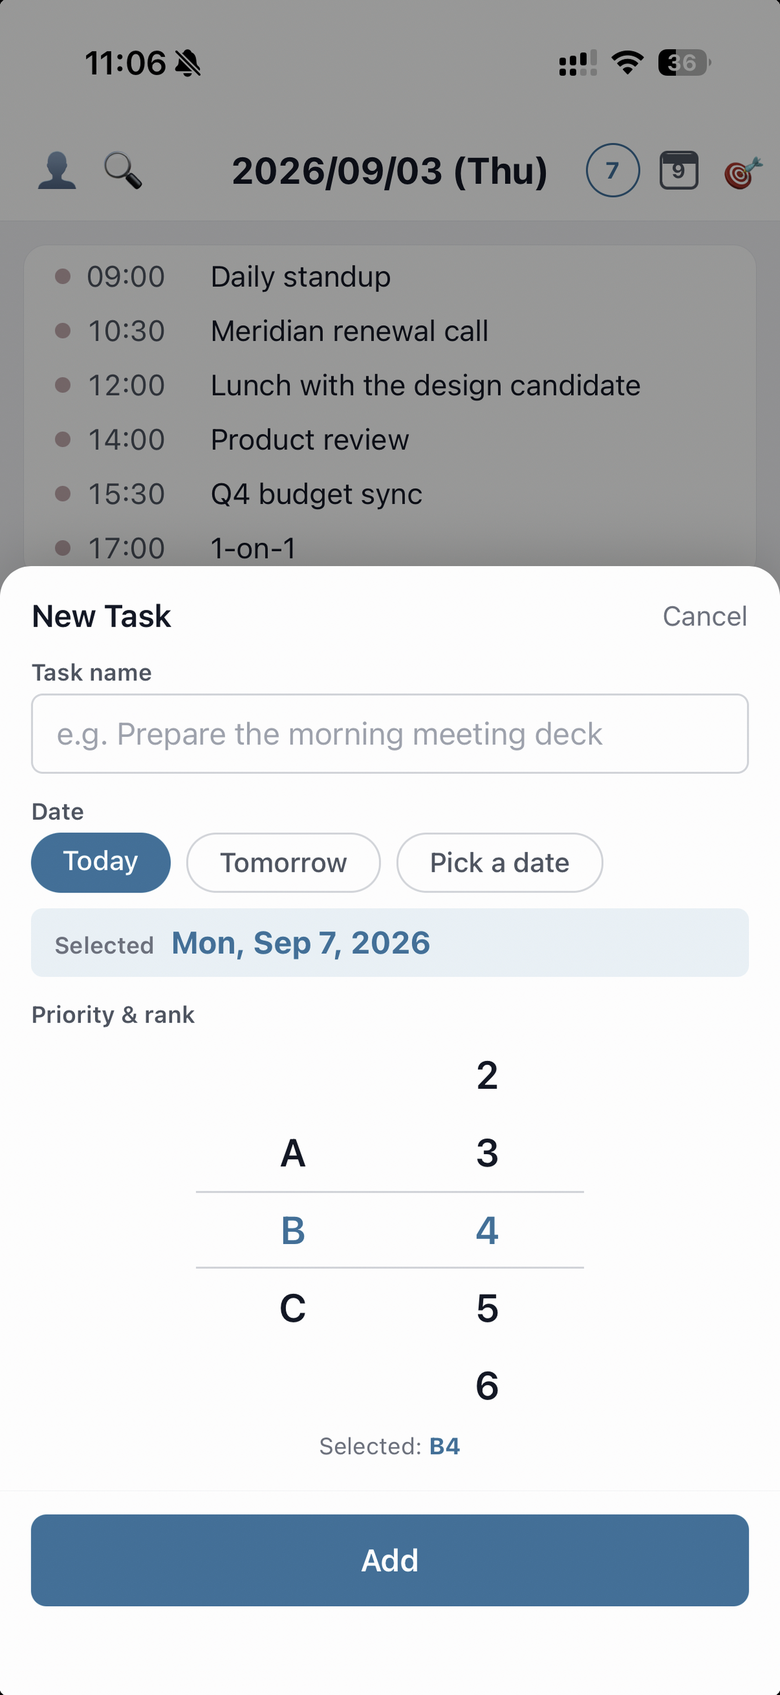
Step 2: Enter a task name
Write down what you’re going to do, briefly. Something like “Prepare the morning meeting deck” — a phrase that tells you what it is at a glance when you come back to it later.
Step 3: Pick a date
Choose the day you plan to do the task.
- Today / Tomorrow — one tap
- Pick a date — for any other day
Whatever you choose stays on screen as Selected, so a mistap is easy to catch.
Step 4: Choose a priority
Pick a priority — A, B, or C — and a rank within it. A1 means “the most important thing today.”
Don’t overthink this at the start. Important things go in A, everything else in B or C, and that’s enough. The next guide covers how to think about priorities properly.
Finish: tap “Add”
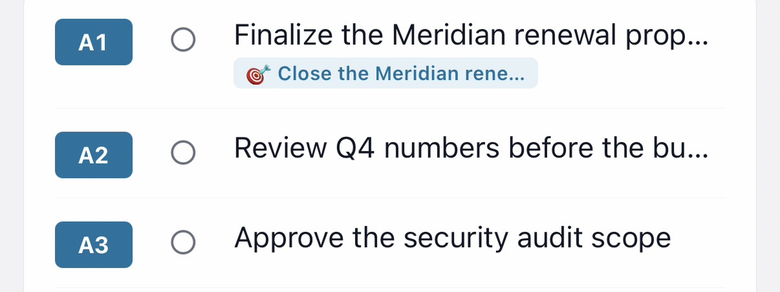
Tap Add, and the task takes its place in the Daily view. Each row starts with a priority badge like A1, so one look tells you what the day is made of.
Once you can create tasks, the next thing to learn is how to prioritize them. Putting the important things first is the idea SpicaGF is built around — the next guide explains how it works.